Windows Subsystem for Linux - Add desktop experience to Ubuntu
Windows 10을 2004 빌드로 올리고, WSL2까지 업데이트를 하고 위 사이트를 따라 해보면 리눅스 그래픽 데스크탑 환경까지 셋팅할 수 있습니다. 가벼운 xfce 데스크탑으로 설치가 되었고, xrdp 까지 설치하면 원격데스크탑 연결까지 가능합니다. Microsoft에서 Windows의 가상환경으로 Linux를 적극적으로 도입한 것으로 보입니다.
다만, Windows가 재부팅이 되면 Linux 터미널 환경에서 xrdp를 다시 실행해야 합니다.
sudo /etc/init.d/xrdp start
아래는 Windows Subsystem으로 설치한 Linux에 xfce 데스크탑 환경을 설정하고,
Windwos에서 원격데스크탑으로 Linux에 접속하는 방법까지 안내하고 있습니다.
Information
Windows Subsystem for Linux (WSL) is a compatibility layer for running Linux binary executables (in ELF format) natively on Windows 10 and Windows Server 2019 (from Wikipedia).
Currently, five different Linux distros can be installed to WSL from Microsoft Store: SUSE Enterprise, OpenSUSE, Kali, Debian and Ubuntu. Additional distros can be installed manually, for instance I have my favorite Linux distro CentOS installed in WSL.
By default, all WSL distros are command line interface only, missing the graphical desktop environment.
In this tutorial I will show how to install a desktop experience in WSL Ubuntu. The same instructions can be used to add desktop to any WSL distro by changing the commands used according to the distro in question.
Method shown in this tutorial requires a 64 bit Windows 10 Pro, Education or Enterprise edition. It does not require any third party software to be installed in Windows 10. Instructions are for Ubuntu WSL release 18.04 or later.
Please notice:
These instructions require WSL2 Linux kernel, which was introduced in Windows 10 Insider build 18917, and will be included in Windows 10 official version 20H1 (2004) which will be released in spring 2020.
If you are running an older Insider build than 18917, or Windows 10 version 19H2 (1909) or older, you cannot install any browsers in Ubuntu desktop. Ubuntu will still have Internet connection, its applications can connect to network and Internet, but you cannot install a browser.
To get started with WSL, see the following Ten Forums tutorials:
- Enable or Disable Windows Subsystem for Linux WSL in Windows 10
- Install Windows Subsystem for Linux (WSL) Distros in Windows 10
Contents
Click links to jump to any part
| Part One: | Update & Upgrade Ubuntu |
| Part Two: | Update Ubuntu to WSL2 |
| Part Three: | Install XFCE Desktop Environment in Ubuntu |
| Part Four: | Install XRDP Remote Desktop Client in Ubuntu |
| Part Five: | Connect to WSL Ubuntu using Windows Remote Desktop Connection |
| Part Six: | Install software in Ubuntu |
Part One
Update & Upgrade Ubuntu
1.1 Start Ubuntu in WSL from Start > U > Ubuntu. If using Windows Terminal, start it by clicking the down arrow in Terminal title bar and selecting Ubuntu:

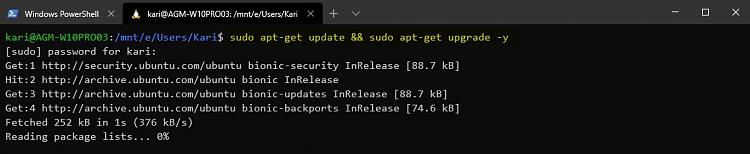
1.2 It is important that Ubuntu is updated before starting this process. Enter following command to fully update and upgrade Ubuntu, entering your Ubuntu user password when prompted:
sudo apt-get update && sudo apt-get upgrade -y
(Click screenshots to enlarge.)
Part One
Update Ubuntu to WSL2
2.1 Original WSL uses a kernel made by Microsoft. It is quite compatible with Linux kernel, but has it flaws. The new WSL2 uses a real Linux kernel. WSL2 is available starting with Windows 10 build 18917.
2.2 If you have upgraded Windows 10 from an earlier build to build 18917 or later, previously installed Linux distros are still using WSL1 kernel. It is important to update them to use WSL2 kernel to be able to install browsers.
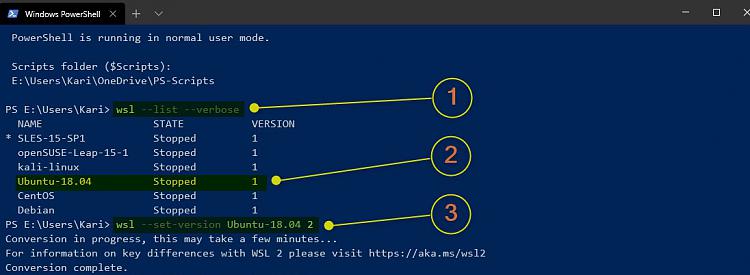
You can check which kernel your distros are using with following command in PowerShell (#1 in next screenshot):
wsl --list --verbose
2.3 Check the kernel (WSL version) Ubuntu is using (#2). If it shows 1 under Version column, it needs to be updated to WSL 2 and real Linux kernel with following command (#3):
wsl --set-version Ubuntu-18.04 2
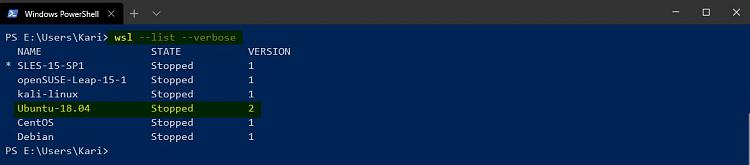
2.4 Using the command in step 2.2, confirm that Ubuntu is now updated to WSL2:
Part Three
Install XFCE Desktop Environment in Ubuntu
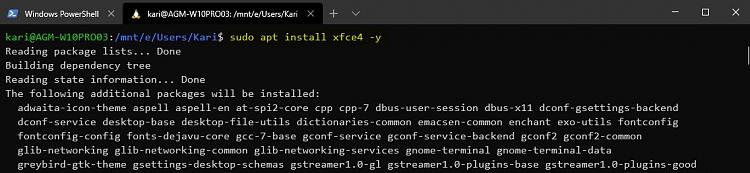
3.1 In Ubuntu shell, enter following command to install XFCE desktop environment:
sudo apt-get install xfce4 -y
3.2 Install additional software to XFCE desktop with following command:
sudo apt-get install xfce4-goodies -y

Part Four
Install XRDP Remote Desktop Client in Ubuntu
4.1 In Ubuntu shell, enter following command to install XRDP Remote Desktop Client:
sudo apt-get install xrdp -y

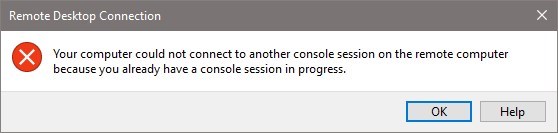
4.2 Windows Remote Desktop Connection uses port 3389 by default. This port is now reserved, connection to Ubuntu shell is using it. We need to change the port used to connect to XFCE desktop, if we leave it for default 3389, Windows Remote Desktop Connection would show an error message when trying to connect:
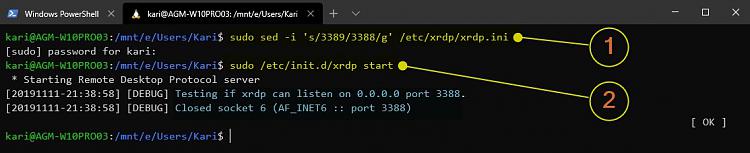
4.3 To change the port from 3389 to 3388 (or any other free port), use the following command in Ubuntu shell (#1 in next screenshot):
sudo sed -i 's/3389/3388/g' /etc/xrdp/xrdp.ini
In the above command, 3389 is the default port which needs to be changed, and 3388 is the new port I want to use.
4.4 Finally, start the XRDP service to allow Ubuntu's XFCE desktop to accept remote desktop connections (#2):
sudo /etc/init.d/xrdp start
Part Five
Connect to WSL Ubuntu using Windows Remote Desktop Connection
5.1 You can close Ubuntu WSL shell now. Until you sign out next time, Ubuntu is running in the background and always ready for remote connection.
Please notice that if you sign out, or restart Windows, you need to start XRDP service again with following command in Ubuntu shell before you can connect to Ubuntu remotely:
sudo /etc/init.d/xrdp start

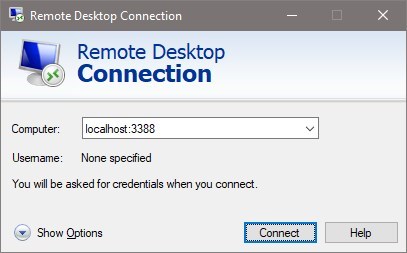
5.2 Connect to Ubuntu XFCE desktop with Windows Remote Connection using the following address:
localhost:3388
Replace 3388 with port number you set in step 4.3.
5.3 Enter your WSL Ubuntu credentials and click OK to sign in:
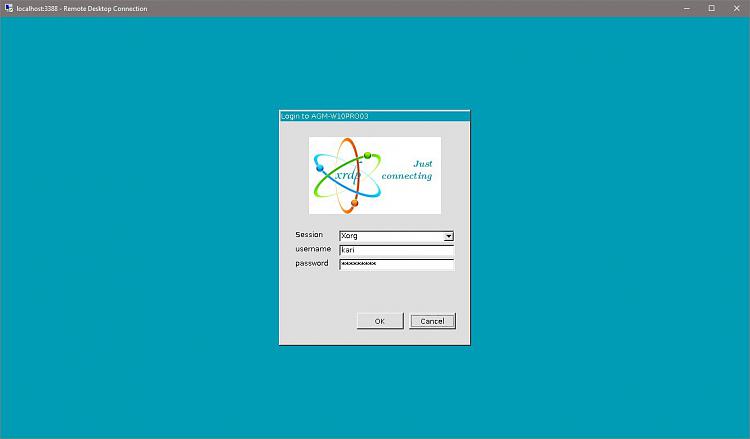
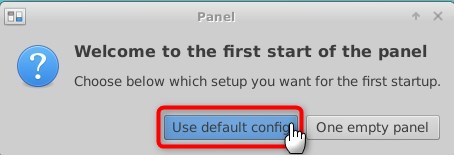
5.4 You are now connected to Ubuntu, its XFCE desktop. At first sign-in, click Use default config. This prompt will not be shown in subsequent sign-ins:
Part Six
Install software in Ubuntu
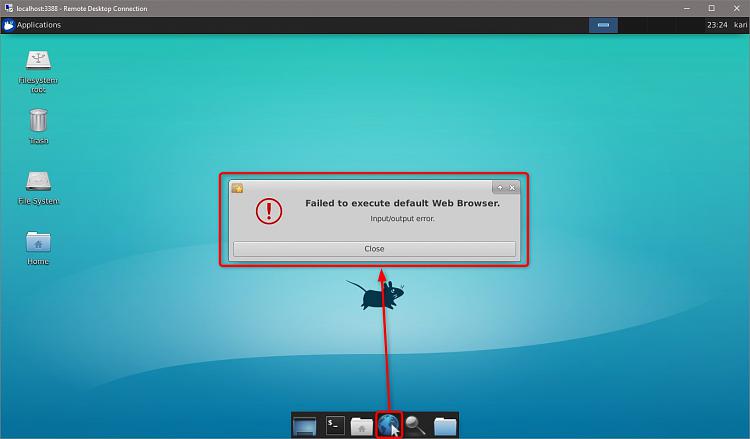
6.1 First application you need to install is the browser. The default XFCE browser does not work, giving an error message when you try to start it:
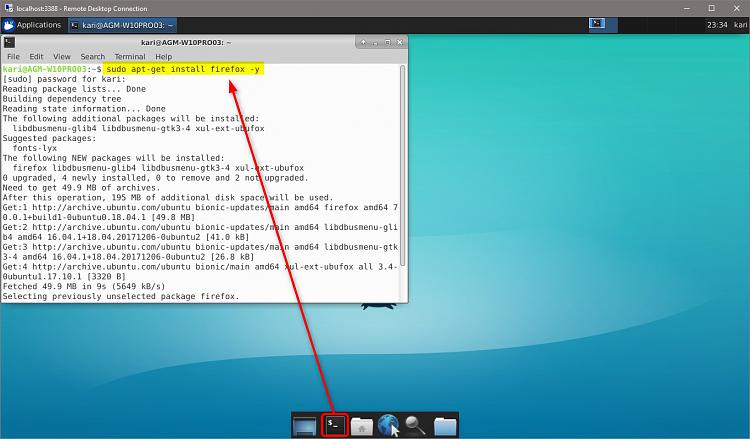
6.2 To install Firefox, open the Terminal app, and enter the following command:
sudo apt-get install firefox -y
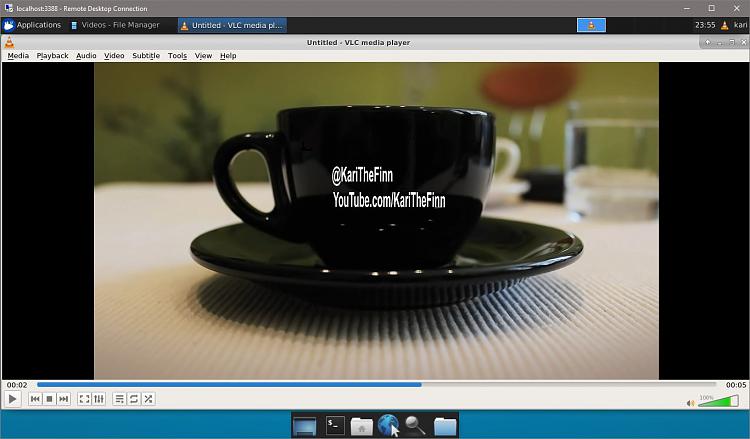
6.3 All software needs to be installed using Terminal. To give an example, I will install VLC Player. Bing and Google are your friends, commands required to install software in Ubuntu can be easily found.
6.4 Installing VLC Player is easy and fast using PPA (Personal Package Archive). In Terminal, enter the following commands one by one:
sudo add-apt-repository ppa:videolan/stable-daily -y
sudo apt-get update
sudo apt-get install vlc -y
6.5 VLC installed. My YouTube channel intro running in VLC Player in WSL Ubuntu XFCE desktop:
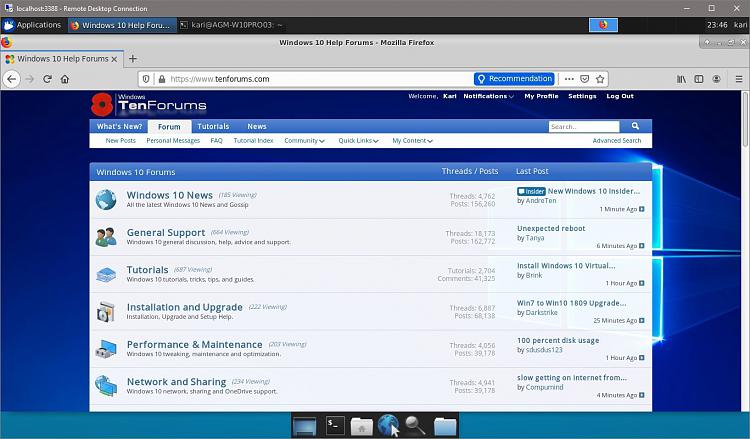
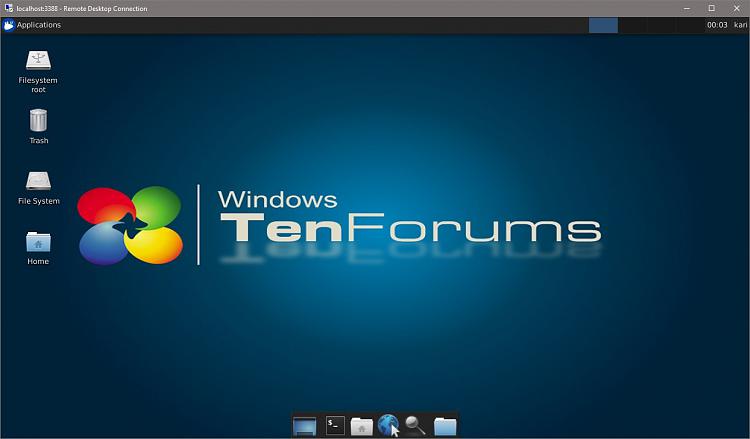
That's it. Easy and fast to get a desktop environment to WSL Ubuntu! Notice that Copy & Paste is working both directions. Here, I have copied a JPG file with Ten Forums background from my Windows Pictures folder and pasted it to Ubuntu, and set it as wallpaper:
Windows Subsystem for Linux - Add desktop experience to Ubuntu
How to add a desktop experience to a Windows Subsystem for Linux distro
www.tenforums.com